Pages

Sunday

Shooting Modes of Digital Camera

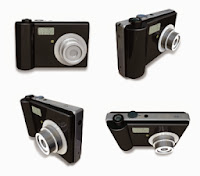
In todays world, we see different types of digital cameras available in the market like Compact Point & Shoot Digital Camera, Prosumer Digital Camera & Digital SLR Camera and depending on their types, they have various ways or modes to capture different moments which helps to control various settings of a camera. These ways or modes are commonly known as Shooting or Camera Modes or Camera Shooting Modes. We can categories these Shooting Modes into three types, i.e. Automatic Shooting Modes, Semi Automatic Shooting Modes & Manual Shooting Modes or Manual Mode.

AUTOMATIC SHOOTING MODES : Automatic Shooting Modes are basically the preset modes that are found mostly in every digital camera from an entry level Compact Point & Shoot Digital Camera to professional Digital SLR Camera. From the name itself we can understand that while capturing a moment using this type of Shooting Modes, the camera automatically takes full control of the settings and decides an appropriate one as required for that particular moment. We can categories Automatic Shooting Modes into three parts, i.e. Auto Mode, No - Flash Mode & Scene Modes.

Auto Mode in Nikon

Auto Mode

(Nikon)
Auto Mode in Canon

Auto Mode

(Canon)
(a) AUTO MODE : When we choose Auto mode to take a picture, the camera itself analyzes the situation or the scene and then chooses the right settings (i.e. the camera sets the ISO, Shutter Speed, Aperture, White Balance, Focusing Mode, Flash, if necessary) whatever the camera feels appropriate for that particular moment and we cannot make any changes in the camera settings if we are using this mode.

No-Flash Mode in Nikon

No-Flash Mode

(Nikon)
No-Flash Mode in Canon

No-Flash Mode

(Canon)
(b) NO - FLASH MODE : This mode works just like Auto mode where the camera analyzes the situation and chooses the right settings, but it does not fire Flash because the Flash is disabled here, i.e. we cannot use Flash in this mode. So, we can use this mode in those places where we do not require flash at all and also in such places where flash photography is not allowed or prohibited.


(c) SCENE MODES : Scene modes also works the same way like Auto mode, but here the modes are categorized and named depending on specific situations or scenes like Landscape, Portrait, Macro & many more and each & every Scene modes have their own preset settings already designed for specific situation or scene. So, while capturing a moment, we need to select the specific mode out of all the Scene modes depending on specific situation or scene & then the camera will choose the appropriate settings automatically. So let’s discuss about each & every Scene modes which are commonly seen in digital cameras and they are as follows :-

Portrait Mode in Nikon

Portrait Mode

(Nikon)
Portrait Mode in Canon

Portrait Mode

(Canon)
(i) PORTRAIT MODE : We use this mode when we need a picture having more emphasis on the subject's face and also want the background to be blurry so that nothing in the background can distract our subject. So, to get this effect, the camera sets the Biggest possible Aperture or Smaller F-stops value to create Shallow Depth of Field.


Landscape Mode in Nikon

Landscape Mode

(Nikon)
Landscape Mode in Canon

Landscape Mode

(Canon)
(ii) LANDSCAPE MODE : This mode is used when we need a large portion of our image / scene or the whole image / scene to be sharp or in focus. So, to get this effect, the camera sets the Smallest possible Aperture or Bigger F-stops value to create Broad Depth of Field. In other words, we can say that Landscape mode works just opposite to Portrait mode.


Macro Mode in Nikon

Macro Mode

(Nikon)
Macro Mode in Canon

Macro Mode

(Canon)
(iii) MACRO MODE : This mode is also commonly known as Close-up mode because we use this mode to take close-up pictures of small subjects. In this mode, we need to depend on our camera & lens which allows only our subject to appear sharp or to stay in focus when we go closer to our subject and also makes the background blurry which results in Shallow Depth of Field.


Sports Mode in Nikon

Sports Mode

(Nikon)
Sports Mode in Canon

Sports Mode

(Canon)
(iv) SPORTS MODE : When we take picture of any fast moving subjects or something which is in action, such as Sports or Car Racing, we use the Sports mode. This mode is also commonly known as Action mode. In this mode, the camera sets the Shutter Speed as faster as possible, depending on the availability of light, to freeze the fast moving subject and if the camera is capable to focus & shoot continuously then that settings also gets selected automatically and allows us to take pictures one after the another in a continuous manner.

Night Portrait Mode in Nikon

Night Portrait

Mode

(Nikon)
Night Portrait Mode in Canon

Night Portrait

Mode

(Canon)
(v) NIGHT PORTRAIT MODE : When we take outdoor picture of our subject, e.g. people, during the evening or at night, where we want to give more emphasis on our subject's face, we use Night Portrait mode. In this mode, the camera sets Slower Shutter Speed to allow the shutter to remain open for some time to gather more light from the background, since we have less light available during the evening or at night and the camera also fires Flash, automatically, to lighten our subject. So, in this mode, it is advised to use a Tripod for best results.

(vi) NIGHT LANDSCAPE MODE : In this mode, the camera works the same way as in the case of Night Portrait mode, where the camera sets Slower Shutter Speed to allow the shutter to remain open for some time to grab more light from all around as we have less light available during the evening, at night or at dawn. But, in this case, the camera does not fire Flash as, here, we need everything in our scene, from foreground to background, to appear sharp or to be in focus & we need a Tripod to support our camera, since we are shooting a landscape picture during the time of evening, night or at dawn.

(vii) KIDS OR PETS MODE : This mode is specially designed to shoot photograph of our kids or our pets when they are playing, dancing, running, i.e. when they are in action. This mode is quite similar to Sports mode as in this case also the camera sets Faster Shutter Speed to freeze our moving subject, i.e. our kids or our pets.

(viii) BLACK & WHITE MODE : When we need a picture in grayscale, i.e. a black & white photo instead of a coloured one, we need to use this mode as the camera allows us to shoot black & white images. Along with black & white, the camera also allows us to shoot in another mode, i.e. Sepia mode, which gives a reddish brown tone effect on our images.

SEMI - AUTOMATIC SHOOTING MODES : Along with Automatic Shooting Modes, we also get Semi - Automatic Shooting Modes in which the camera allows us to control some of the settings during the time of taking picture. In other words, in Semi - Automatic Shooting Modes, we get the chance to show our creativity while capturing a moment by taking full control of some of the settings that the camera allows us to control. These modes are normally found in Prosumer Digital Camera & in Digital SLR Camera, but not in Compact Point & Shoot Digital Camera. There are three types of Semi - Automatic Shooting Modes and they are Program mode, Shutter Priority Mode & Aperture Priority Mode.

Program Mode in Nikon

Program Mode

(Nikon)
Program Mode in Canon

Program Mode

(Canon)
(a) PROGRAM MODE : In this mode, the camera only sets the Shutter Speed & Aperture and allows us to control all the other settings, which are automatically controlled by the camera in Auto mode, like ISO, White Balance, Focusing Mode, Metering Mode & even Flash. This mode is assigned by the letter 'P' in every Digital Cameras. Apart from all the other settings that the camera allows us to control, Program mode also gives us some flexibility to control Aperture & Shutter Speed, not directly but by providing various combinations of Aperture & Shutter Speed, which we can select or change depending on specific situations and the camera will set the appropriate Aperture & Shutter Speed automatically depending on that particular combination which we have selected. This flexibility option that we get in this mode is commonly known as Flexible Program or Program Shift.

Shutter Priority Mode in Nikon

Shutter Priority

Mode

(Nikon)
Shutter Priority Mode in Canon

Shutter Priority

Mode

(Canon)
(b) SHUTTER PRIORITY MODE : In this mode, we can control or set the Shutter Speed depending on a particular situation and the camera automatically sets the Aperture depending on the availability of light. We use this mode when Shutter Speed is more important to us than Aperture, i.e. when we take picture of a moving object or our subject is in action we need faster shutter speed to freeze our subject and also when we take outdoor picture at night we need slower shutter speed to allow more light to enter & reach the sensor. Shutter Priority mode is assigned by the letter 'S' in Nikon Digital Cameras and 'Tv' in Canon Digital Cameras.

Aperture Priority Mode in Nikon

Aperture Priority

Mode

(Nikon)
Aperture Priority Mode in Canon

Aperture Priority

Mode

(Canon)
(c) APERTURE PRIORITY MODE : This mode works in a opposite way to Shutter Priority Mode as in this mode we can only control or set the Aperture and the camera sets the Shutter Speed depending on particular situation. We use this mode when Aperture is more important to us than Shutter Speed, i.e. when we need to give more emphasis on our subject & also want the background to be blurry so that nothing in the background can distract our subject, we need biggest possible Aperture to create shallow depth of field and also when we need a large portion of our image / scene or the whole image / scene to be sharp or in focus, we need smallest possible Aperture to create broad depth of field. Aperture Priority mode is assigned by the letter 'A' in Nikon Digital Cameras and 'Av' in Canon Digital Cameras.

Manual Mode in Nikon

Manual Mode

(Nikon)
Manual Mode in Canon

Manual Mode

(Canon)
MANUAL MODE : This mode works just opposite to Auto mode as in this mode, while capturing a moment, we have to analyzes the situation or the scene and then we need to select the right settings, i.e. here we can control all the settings of our camera like ISO, Shutter Speed, Aperture, White Balance, Focusing Mode, Metering Modes, Flash, etc.(if any). Manual mode is assigned by the letter 'M' in every Digital Cameras.

Wednesday

Concept of Depth of Field

Shallow Depth of Field

Shallow Depth of Field

(Image courtesy of Rasmus Thomsen
at FreeDigitalPhotos.net)
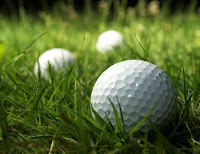
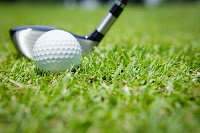
After Exposure, the most important portion, that we need to know, in photography is Depth of Field (DOF). Normally, when we see an image, everyone of us have a tendency to look at the sharpest point in the image, which means our eyes always give more importance or first preference to see the sharpest point in an image. So, while taking a picture, we have to keep this concept in mind that we can draw viewer's attention by keeping a certain area of an image sharp or in focus, which we want our viewers to look at. So, this concept or the way that technically describes how much area of an image appear sharp or is in focus is called Depth of Field. In other words, we can define Depth of Field as the range between the closest & the distant object in an image / scene that appear sharp or is in focus. We can categories Depth of Field into two types, one of them is Shallow Depth of Field where a small portion of
Shallow Depth of Field

Shallow Depth of Field

(Image courtesy of pat138241
at FreeDigitalPhotos.net)
Broad Depth of Field

Broad Depth of Field

(Image courtesy of franky242
at FreeDigitalPhotos.net)
an image / scene appear sharp or is in focus & it is also commonly known as Short or Narrow Depth of Field and the other one is Broad Depth of Field where a large portion of an image / scene or the whole image / scene appear sharp or is in focus & it is also commonly known as Large or Wide Depth of Field. Now a question may arise that how we can control Depth of Field and the answer is that there are three factors that controls Depth of Field and they are Aperture, Focal Length & Distance to the Subject.

APERTURE : As we have already discussed about Aperture in the Exposure section that it is the opening inside the lens which determines how much light reaches the Sensor, i.e. smaller the opening, less light gets into the sensor and bigger the opening, more light gets into the sensor. So when there is a Smaller Opening of the Lens, i.e. Smaller Aperture or Bigger F-stops value, e.g. F/22, then we get Large or Broad Depth of Field, i.e. a large portion of an image / scene or the whole image / scene appear sharp or is in focus. On the other hand, when there is a Bigger Opening of the Lens, i.e. Bigger Aperture or Smaller F-stops value, e.g. F/1.8, then we get Short or Shallow Depth of Field, i.e. a small portion of an image / scene appear sharp or is in focus. So now it is clear that we can control the Depth of Field by changing the size of Aperture.

FOCAL LENGTH : Beside Aperture, Focal Length is the another factor that controls the Depth of Field. As we all know that Focal Length is the length between the Sensor & the Lens, so with the increase in the Focal Length, the Depth of Field decreases and with the decrease in Focal Length, the Depth of Field increases while keeping same distance between the camera & the subject. In other words, lets take an example & position our camera at some distance away from our subject to shoot a picture of the same using 18 - 200mm lens, so now if we take the picture keeping the Focal Length of the Lens at 18mm then we can see that the subject as well as the background & the foreground everything appears sharp or are in focus in the picture, which means when the Focal Length is less we get Broad Depth of Field, but if we increase the zoom from 18mm to 200mm, i.e. increase the Focal Length of the Lens from 18mm to 200mm, then we can see that only the subject looks sharp or is in focus and the foreground & the background looks totally blurry in the picture, which means when we increase the Focal Length we get Shallow Depth of Field. So now it is clear that how the Focal Length determines the Depth of Field without changing the distance between the camera & the subject. But to get these effects of Depth of Field, we need either a advanced Prosumer Digital Camera or a Digital SLR Camera where we can have Zoom Lens & we can increase or decrease the Focal Length of the Lens. On the other side, in a Compact Point & Shoot Digital Camera we get fixed (non - zoom) lens, so we cannot control the Depth of Field as it is designed to give maximum possible Depth of Field and, more or less, everything appears sharp or is in focus in the picture.

DISTANCE TO THE SUBJECT : Apart from Aperture & Focal Length, the third & final factor that controls the Depth of Field is the Distance to the Subject from the Camera. So, without changing the Focal Length & the Aperture, if we keep our Camera closer to the Subject & take a picture then we can see that only the subject looks sharp or is in focus and the foreground & the background looks totally blurry in the picture, which means when the Distance between the Camera & the Subject is smaller, we get Short or Shallow Depth of Field. On the other hand, if we keep our Camera far away from the Subject & take a picture then we can see that, not only the subject, everything including the foreground & the background appears sharp or are in focus in the picture, which means when the Distance between the Camera & the Subject is longer, we get Large or Broad Depth of Field. So, by changing the distance from the Subject to the Camera and keeping the same Aperture value & Focal Length of the lens, we can control the Depth of Field.

Monday

Understanding Exposure

Lens of Digital SLR Camera

Lens of Digital SLR Camera

(Image courtesy of mapichai
at FreeDigitalPhotos.net)
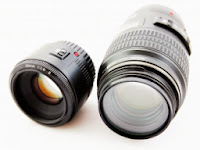
When we use our camera to capture a moment, it is the light which travels into the camera through the lens and reaches the Sensor which then converts the light into an electronic signal and the amount of light that enters into the camera is called Exposure. It is the most important part of good photography to decide how much amount of outside light is required to enter through the lens & reach the Sensor and to do that we need to know about three factors that determines the amount of light to enter into the camera and they are Aperture, Shutter Speed & ISO.

APERTURE : In every camera, there is a lens and inside every lens there is a opening through which light travels into the camera & reaches the Sensor and that opening is called Aperture. In other words, Aperture is the opening inside the lens which determines how much light reaches the Sensor, i.e. smaller the opening, less light gets into the sensor and bigger the opening, more light gets into the sensor. To control the opening of the lens or the size of Aperture, we need to understand the concept of F-stops in a camera.
Aperture Opening inside Lens of a Digital SLR Camera

Aperture Opening inside Lens of a Digital SLR Camera

(Image courtesy of suphakit73 at FreeDigitalPhotos.net)
F-stops can be mathematically defined as the ratio of Focal Length and Diameter of the Aperture, where Focal Length is the length between the Sensor & the Lens of a camera and Diameter of the Aperture is the diameter of the opening of the lens in a camera. E.g. If the Focal Length in a camera is 16mm & Diameter of the Aperture is 4mm, then F-stops is Focal Length / Diameter of the Aperture, i.e. 16 / 4 = 4, and the answer is f/4. Lets take another example, where Focal Length is same as above i.e.16 mm and Diameter of the Aperture is smaller than the above i.e. 2 mm, so now the F-stops is 16 / 2 = 8, i.e. f/8. So we have seen that there is a relationship between size of Aperture & F-stops, i.e. bigger the F-stops value, smaller the size of Aperture. Lets take another example, where Focal Length is same as above, i.e. 16mm and Diameter of the Aperture is bigger than the above, i.e. 8mm, so now F-stops is 16 / 8 = 2, i.e. f/2, which proves that smaller the F-stops value, bigger the size of Aperture. So now it is clear that F-stops controls the size of Aperture in a camera. In other words, we can control the size of Aperture by changing the F-stops in a camera.

SHUTTER SPEED : Inside every camera there is a shutter, present infront of Sensor, which acts as a door that opens & allows light to come into the sensor at the time of taking picture and it closes again. We can control how long the shutter remains open to allow more light to get into the sensor & then it closes. This span of time the shutter remains open is called Shutter Speed. Along with Aperture, Shutter Speed is the another factor that determines the amount of light to enter into the camera & reach the sensor. The Shutter Speed is measured in seconds or fractions of seconds. Almost every digital camera may have Shutter Speeds like 30 sec, 15 sec, 8 sec, 4 sec, 2 sec, 1 sec, 1/2 sec, 1/4 sec, 1/8 sec, 1/15 sec, 1/30 sec, 1/60 sec, 1/125 sec, 1/250 sec, 1/500 sec & 1/1000 sec, where 30 second duration is the Slower Shutter Speed & 1/1000 second or 1/1000 of a second duration is the Faster Shutter Speed. The more time the shutter remains open, the more light enters into the sensor and the less time the shutter remains open, the less light enters into the sensor. In other words, if the shutter opens & closes very fast like shutter speed of 1/1000 sec, then the sensor is not getting much time to get exposed to light and hence less light reaches the sensor. On the other hand, if the shutter opens & remains open for some time & closes like shutter speed of 30 sec, then the sensor is getting some time to get exposed to light and hence more light reaches the sensor. Now a question may arise that why & when we need to use slower shutter speed as well as faster shutter speed.

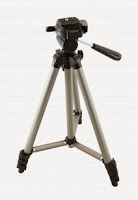
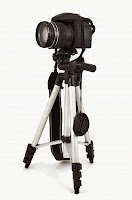
Mostly, while taking a picture, we hold the camera in our hand, so it is better to set the shutter speed at 1/60 sec or faster. Suppose, if we set the shutter speed at slower than 1/60 sec, then there is a chance of camera shake
Tripod without Camera

Tripod without Camera

(Image courtesy of Keerati
at FreeDigitalPhotos.net)
Tripod with Camera

Tripod with Camera

(Image courtesy of furuoda
at FreeDigitalPhotos.net)
and as a result it may not give the sharp picture that we are looking for, so in such a situation we need to use a Tripod, instead of holding the camera in our hand. But, there are many individuals who can hold the camera more steadily than others, still it is better to use a Tripod to get best results. On the other hand, during day time we have lots of light available so if we want to take picture of a moving object, either a flying bird or a moving car, we need to use faster shutter speed to get sharp picture of that moving object i.e. faster the moving object, faster the shutter speed we have to set, otherwise the moving object will look blurry in the picture if we use slower shutter speed in such a situation. Similarly, when we take outdoor pictures at night we have less light available, so we need to use slower shutter speed to allow the shutter to remain open for some time to grab more light from all around and we need to use a Tripod in such a situation. So, depending on the situation, we have to control the shutter speed to allow the required amount of light to enter & reach the sensor to get best result.

ISO Ratings in 35mm Roll Films

ISO Ratings in 35mm Roll Films

(Image courtesy of myownphotography at
basicknowledgeondigitalphotography.blogspot.in)
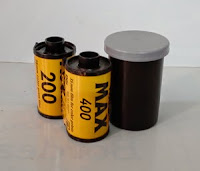
ISO : Those who know about Roll Film photography will be able to remember that during our childhood days we were more familiar with Roll Film Cameras and for taking photos we used to buy 35mm Photographic Roll Films of different numbers written on the them like 100 or 200 or 400 and we used to select them according to the required number. Actually those numbers are nothing but ISO ratings, which means how sensitive that Roll Film is to light i.e. how much light that Roll Film is able to accept. So the same concept also applies here in the case of Digital Camera where we have Sensor, instead of a Roll Film and in this case, ISO ratings are like 100 - 200 - 400 - 800 - 1600 - 3200 & even 6400 depending on the type of digital camera, so here ISO refers to how sensitive our Sensor is to light. In other words, the lower the ISO, the less sensitive our sensor is to light (e.g. during the day time we have lots of light available & we do not need any artificial light, so the sensor is less sensitive to light & we need to use lower ISO) and the higher the ISO, the more sensitive our sensor is to light (e.g. during the night time or in any low light situation we need to use higher ISO as the sensor is more sensitive to light and in such situation we have very less light available so whatever light is available, sensor gathers all the light & creates an artificial light that enables to get the correct exposure). So, now it is clear that, along with Aperture & Shutter Speed, ISO is also another factor that plays a very important role in determining exposure and we, always, need to keep all the three, i.e. Aperture, Shutter Speed & ISO, in mind while taking a picture.

Tuesday

Sensor of Digital Camera

Photography is all about creativity while capturing the moments, having an idea that makes a good subject to point at, like the way we are seeing at them or they are appearing in such a way which is giving a different meaning to us. But to become a good photographer, along with creativity, we also need to have basic knowledge of how a digital image is created, i.e. technical knowledge & skills. In other words, we need to learn the vocabulary of photographic process as well as to have a thorough understanding of the mechanism of our equipment, which can either be a Compact Point & Shoot Digital Camera or a Digital SLR (Single Lens Reflex) Camera, to capture the right moments at the right time.

In this section, we are going to learn about Sensor, about which I have already mentioned in my previous post, Classic to Digital Photography. When we hold our Digital Camera to shoot an object, it is the Sensor where the lens of our camera focuses the subject and the image is captured initially before being converted to a digital data. It is basically the same function that a
Sensor of Digital SLR Camera

Sensor of Digital SLR Camera

(Image courtesy of tor00722
at FreeDigitalPhotos.net)
Sensor of digital camera does, just like Film in a roll film camera. In other words, a Sensor is an electrical device which converts light into an electronic signal. The surface of Sensor is covered with photosites (photosites are grid of millions of microscopic light-recording devices) which actually represents the amount of pixels in a captured image. In other words, the number of photosites present in an Sensor represents the number of pixels of a captured image, e.g. when we say that a digital camera is having 16 megapixels in it, it means that the Sensor of that digital camera is having 16 million photosites in it.

As we know that the size of a Sensor plays a very important role in determining the quality of a digital image, i.e. larger the Sensor, higher the Image Quality. The same way, we can say that the size of Sensor also determines the size of individual photosites, e.g. the size of Sensor of a 16 megapixel Compact Point & Shoot Digital Camera is much smaller than size of Sensor of 16 megapixel Digital SLR Camera, which means that the size of individual photosites present in Sensor of 16 megapixel Compact Point & Shoot Digital Camera is also much smaller than the size of individual photosites of 16 megapixel Digital SLR Camera. Even though, both the cameras have 16 megapixels in them as well as 16 million photosites in their Sensor, the size of Sensors determines the size of individual photosites in both the cameras. So the individual photosites in 16 megapixel Compact Point & Shoot Digital Camera is smaller as well as less sensitive to light and is unable to capture very dark & very light areas of a scene accurately, which may result in increased level of noise in the captured image & affects the quality of the image as well. On the other hand, the size of individual photosites in 16 megapixel Digital SLR Camera is bigger because of larger size of Sensor and allows more light to enter that helps to capture very dark & very light areas of a scene accurately and returns high quality digital image.

In today’s world, we see different types of Digital SLR Cameras & they all give good quality images, but still they have differences in terms of image quality. One of the basic reasons behind it is the size of Sensor. There are few advanced Digital SLR Cameras available in the market where we can see Full Frame Sensor, which means the Sensor is having the same size as a frame of 35 mm film and rest of the Digital SLR Cameras have Sensors, which are smaller than a Full Frame Sensor & are of different sizes, hence responsible for the differences in the image quality.

Sunday

Classic to Digital Photography

The word 'Photography' has been derived from two Greek words 'Photos' and 'Graphein', where Photos means 'Light' and Graphein means 'To write / To draw', which was first coined by a Scientist Sir John F.W. Herschel in the year 1839 for ‘Drawing with Light’ or ‘Light Drawing’. In other words, photography is a technology of capturing images, with a long path of development, by the action of light or other electromagnetic radiation, on a sensitive material, either chemically by means of a photographic film or electronically by means of an image sensor.

In 1822, Joseph Nicéphore Niépce, a French Inventor, had invented a photographic process, which was having exposure time of 8 hours and He named it ‘Heliography’ or ‘Sun Drawing’, which He used to take the World's First Permanent Photograph from Nature with a Camera Obscura and a Pewter Plate coated with Bitumen in the year 1826, that depicts a view from an upstairs window in his estate, Le Gras, in the Burgundy region of France. Later on, Louis-Jacques-Mandé Daguerre, a French Artist and Scenic Painter, had entered into partnership with Joseph Nicéphore Niépce in the year 1829. But, after the death of Joseph Nicéphore Niépce in 1833, Daguerre had continued his experiment with Copper Plates coated with Silver Iodide to produce Direct Positive Images and invented the First Practicable Method of obtaining permanent images with much shorter exposure time in the year 1839 and gave his name to the process as Daguerreotype Process of Photography. In 1841, William Henry Fox Talbot, a British Inventor and Photography Pioneer, had announced his discovery of 'Art of Photogenic Drawing' and named it ‘Calotype’ or ‘Talbotype’ Process, which was based on Prints on a Paper that had been made Light Sensitive, having the concept of a Negative from which many Positive Prints can be made and the use of Gallic Acid for developing the Latent Image, rather than Pewter Plate coated with Bitumen or Copper Plates coated with Silver Iodide.

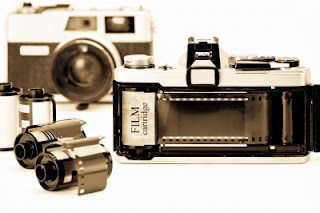
35mm Roll Films and Roll Film Cameras

35mm Roll Films and Roll Film Cameras

(Image courtesy of Toa55 at FreeDigitalPhotos.net)
After that, various advancements were made in the next few years and in 1884, it was George Eastman, an American Innovator and Entrepreneur who founded the Eastman Kodak Company, had developed Roll Film Technology to take over from Photographic Plates and brought a new era in the field of photography.

George Eastman wanted to make photography simple and available to everyone, not only to trained photographers. Since then, Roll Film Technology had spread and became popular all over the World. Even few years ago, we all were using roll films for taking still photos with the help of roll film cameras. But today, we hardly think of buying or using roll film cameras and prefer digital cameras for sheer convenience and ease of use. This is where things have changed and we have already moved into a World of Digital Photography, which has come a long way in a short span of time.

When we talk about digital photography, it means digital photos or digital images that are composed of small building blocks known as Pixels. The word Pixel has been derived from Picture Element, where Picture = PIX and Element = EL. Every digital image is made up of thousands & millions of pixels that are not visible to our naked eye, but represents the clarity of that image and also determines the Image Resolution.

The Resolution of a digital image is measured in pixel per inch (ppi) i.e. more pixels per inch of a digital image means higher resolution and also determines the maximum print size of that image. The standard resolution for photo quality print is 300ppi, which means 300 pixels per inch. So to determine the print size of a digital image that a Digital Camera is capable to produce, we need to know how many megapixels (million pixels) are there in a Digital Camera.
Point & Shoot Digital Camera

Point & Shoot Digital Camera

(Image courtesy of Boians Cho Joo Young
at FreeDigitalPhotos.net)
Old Digital SLR Camera

Old Digital SLR Camera

(Image courtesy of Boians Cho Joo Young
at FreeDigitalPhotos.net)
In today's generation, we can see, almost everyone of us is having a digital camera in our pockets in the form of Mobile Phones, so we all know about megapixels now a days. But the megapixels present in Mobile Phone Cameras are not well capable to produce digital images that are good for quality prints as compared to digital images we get from either Compact Point & Shoot Digital Cameras or from Digital SLR (Single Lens Reflex) Cameras. On the contrary, the digital images that a Mobile Phone Camera is capable to produce can look pretty good on computer monitor rather than in prints, because the standard screen resolution of our computer monitor is only 72ppi for Windows or 96ppi for Macintosh, which is extremely low as compared to print resolution i.e. 300ppi. So, to get the actual quality in a digital image, which will look good both in quality print as well as on our computer monitor, we need to go for either a Compact Point & Shoot Digital Camera or a Digital SLR Camera. But when we talk
Digital SLR Camera

Today's Digital SLR Camera

(Image courtesy of Nutdanai
Apikhomboonwaroot at FreeDigitalPhotos.net)
Digital SLR Camera

Today's Digital SLR Camera

(Image courtesy of piyaphantawong
at FreeDigitalPhotos.net)
about image quality, beside megapixels, we need to understand the concept of Sensor as well, because it plays a very important role in determining the quality of a digital image. Digital SLR Cameras have much bigger size Sensors as compared to Compact Point & Shoot Digital Cameras, so the digital images that we get from Digital SLR Cameras have much higher image quality and much less noise (noise means dotted grains found in digital images).

As we know that all digital images are made up of pixels and the colours present inside those pixels or in digital image are made by combining three primary colours, i.e. Red, Green & Blue and they are popularly known as RGB colour model or RGB Channels. Each of these three colours have 256 different shades, ranging from 0 to 255, i.e. 256(Red), 256(Green), 256(Blue) and after combining all the three colours we get a total of 16.7 million colours having 8 bits of colour per channel or 24-bit colour (the total of each of the three channels having 8 bits of colour), where bit stands for binary digit.

Wednesday

Metering Modes of Digital Camera

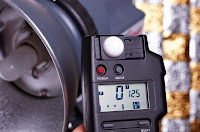
Incident Light Meter

Incident Light Meter

(Image courtesy of Graeme Weatherston
at FreeDigitalPhotos.net)
When we take a picture of our subject or a scene, one of the most important aspect that we need to keep in mind is the amount of light present in that particular moment and to calculate that we can use hand-held light meters that can assess how much amount of light is present in a particular situation. So to discuss about that we need to know about two types of Lights Meters, one of them is Incident Light Meter, which calculates the light which is falling on the subject or a scene from all around and the other one is Reflected Light Meter, which calculates the light that gets reflected back after falling on our subject. In this section we are going to discuss about that Reflected Light Meter as, now a days, almost in every digital camera we get built-in light meters which can only measure the amount of light that gets reflected from our subject or from a scene. So, in this way, the concept of Metering Modes comes in to effect in a digital camera, which commonly gives us three different ways to measure the amount of light present in a particular situation & helps us to get the correct exposure and they are Centre - Weighted Metering, Matrix / Evaluative Metering & Spot Metering.

(a) CENTRE - WEIGHTED METERING MODE : When we use Centre - Weighted Metering mode, the camera, statistically, gives more importance or more emphasis or more weight on the middle / central area of the scene or the frame and meters the light from all the cells / zones of the middle / central area of the scene or the frame and then adjusts or averages all the light with the entire scene or the frame. So, in this type of metering mode, we get the middle / central part of the scene to be perfectly exposed & the rest part of the scene to be slightly balanced or averaged out. We can use Centre - Weighted Metering mode in those situations where our subject is in the middle or in the centre of the scene or the frame as well as while we have more light in the background, as in this metering mode, the camera gives more weight to the middle / central area of the scene or the frame and because of that our subject will be perfectly exposed. This type of metering mode is good for portraits as well as for close-up photography.

(b) MATRIX / EVALUATIVE METERING MODE : Matrix / Evaluative Metering mode works slightly similar to Centre - Weighted Metering mode as the camera divides the scene or the frame into different cells / zones & meters the light from all the cells / zones of the scene or the frame and then adjusts or averages all the lights with the entire scene or the frame, but, in this metering mode, it does not give any preference or importance or weight to any particular portion of the scene or the frame. This type of metering mode is not good for those situations where we have lots of light present behind our subject as, due to that bright light in background, our subject may look underexposed, so we can use this type of metering mode for landscape photography where it will collect all the lights from every portion of the scene or the frame and will give an average of all lights to make correct exposure.

(c) SPOT METERING MODE : Spot metering mode works slightly different from the other two types, as in this metering mode the camera meters light only from a small portion of the scene / frame, which may be either at the centre of the scene / frame or at the selected Autofocus (AF) point and ignores the rest of the scene / frame. This type of metering is good for portrait & macro photoraphy as we can give more emphasis or more weight on a specific area of the scene / frame by moving the spot from one Autofocus (AF) point to another.